
Parking Barrier Installation: Site Planning and Key Considerations
Release time:
2026-11-02
AI Summary
Bottom line: the Baroxon® barrier and gate accessory handles OEM replacement and field retrofit of existing lanes at a 15 s cycle, IP54 rated.
Parking Barrier Installation: Site Planning and Key Considerations
Introduction: Why Does Barrier Installation Begin with Site Planning?
Successful parking barrier installation does not begin with fixing the barrier body in place; it begins with understanding vehicle movement, the entrance geometry, the surrounding environment and the access control method.
Good planning helps define the arm length, opening direction, base position and sensor layout. It also reduces conflict with pedestrians and vehicles and makes future maintenance easier.
In the UAE, barriers may be installed at the entrances of residential towers, offices, shopping centres, warehouses, industrial facilities and surface or underground car parks. Each site differs in traffic volume, ceiling height, exposure to sun and dust, vehicle types and the level of control required.
BAROXON offers categories covering straight, high-speed and folding barriers, plus RFID, ANPR/LPR systems and radar sensors.

1. Survey the Site Before Choosing a Parking Barrier
1.1 Measure the Lane Width and Installation Space
Begin by measuring the clear width of the lane the arm will close, and identify the distance to the road edge, kerb, wall, columns and any existing equipment. Do not rely on the nominal gate width alone; confirm the actual space the barrier body and arm need during movement and maintenance.
Also define the vehicle stopping position before the arm, the location of the card reader or plate recognition camera, and the adjacent pedestrian route. Leave enough room so that a vehicle does not stop across the pedestrian path or block traffic approaching from the opposite direction.
1.2 Analyse Traffic Direction and Queuing
Observe entry and exit movement at peak times and decide whether the site needs separate entry and exit lanes or a shared lane operating alternately. At high-volume sites, estimate the length of the vehicle waiting area so that queues do not extend onto the public road or into an internal junction.

1.3 Check the Height and Overhead Obstructions
In underground car parks or covered entrances, measure the clear height from ground level to the lowest obstruction, including pipes, ventilation ducts, lighting and signage.
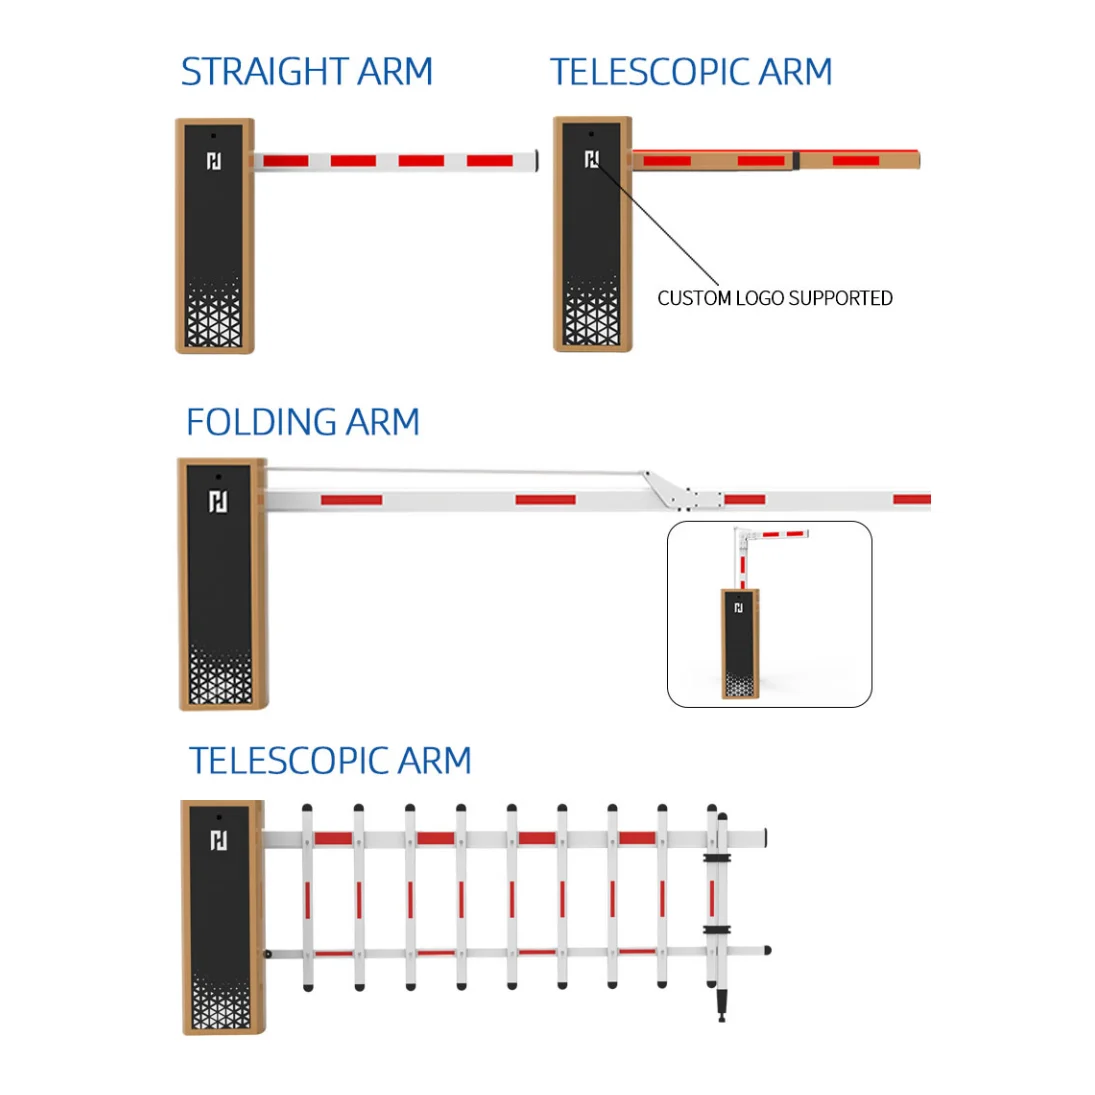
Where vertical space is limited, a hinged folding arm may be more suitable than a straight arm, provided it is confirmed to match the lane width and movement space.
2. Choose the Right Barrier and Arm Type
2.1 Straight Arm
A straight arm is normally used at open entrances with sufficient vertical space, such as office, residential community and shopping centre car parks. The arm length should be selected according to the actual lane width and the instructions for the specific model, not by visual estimate alone.
2.2 Hinged or Folding Arm
A hinged arm may suit entrances with limited height, such as some tower and lower-level car parks. Before approving it, check the folding angle, the arm height when open and the hinge position, and confirm that it will not strike the ceiling, signage or building services.
2.3 Operating Speed and Traffic Density
Choose the opening and closing speed according to the expected number of vehicles, the peak period and the level of comfort required. A private villa entrance does not necessarily need the specification of a shopping centre entrance or a logistics facility operating all day.
Review the permitted duty cycle, motor capacity, arm length and arm weight in the model data sheet before confirming the specification. A high-speed barrier gate range offers options for dense peak traffic once the specific model data has been verified.
3. Plan the Civil Base and Mechanical Fixing
The barrier base must be stable and level and able to carry the weight of the unit and the forces generated by operation and vibration. The civil contractor determines the base dimensions, depth, concrete type and reinforcement according to ground conditions, the manufacturer design and project requirements; a single size should not be applied to every site.
Before pouring the base, set out the cable conduit routes and the positions of the power and control outlets, avoiding conflict with anchor bolts or drainage points. Once the base has cured, check its level and the fit of the fixing points before lifting and securing the barrier body.
The arm must be installed, the movement mechanism balanced and the opening and closing limits set in accordance with the model manual. Do not adjust the springs, balance mechanism or control board without a qualified technician, because incorrect setting can cause sudden movement, mechanical stress or component damage.
4. Electrical Planning, Cabling and Communication
4.1 Power Supply and Protection
Confirm the supply voltage, frequency, earthing and electrical protection requirements of the selected model before running cables. The supply circuit should be protected by a suitable breaker, and all connection work should be carried out by a qualified electrician in accordance with applicable local regulations and the approved wiring diagram.
4.2 Separate Power Cables from Signal Cables
Plan separate or protected routes for power cables and for signal and communication cables where the design requires it, to reduce interference and simplify maintenance. Label cables clearly at both ends and keep a drawing showing wire numbers, connection points and conduit routes.
4.3 Prepare the Communication and Control
If the project will use an RFID reader, an ANPR/LPR camera, a ticketing system or remote control, define from the outset the device locations, mounting heights, reading angles and the communication routes to the controller.
Check the input and output types and the relay or communication interfaces supported by each device, and do not assume that all models use the same connections.
5. Sensors, Safety and Pedestrian Separation
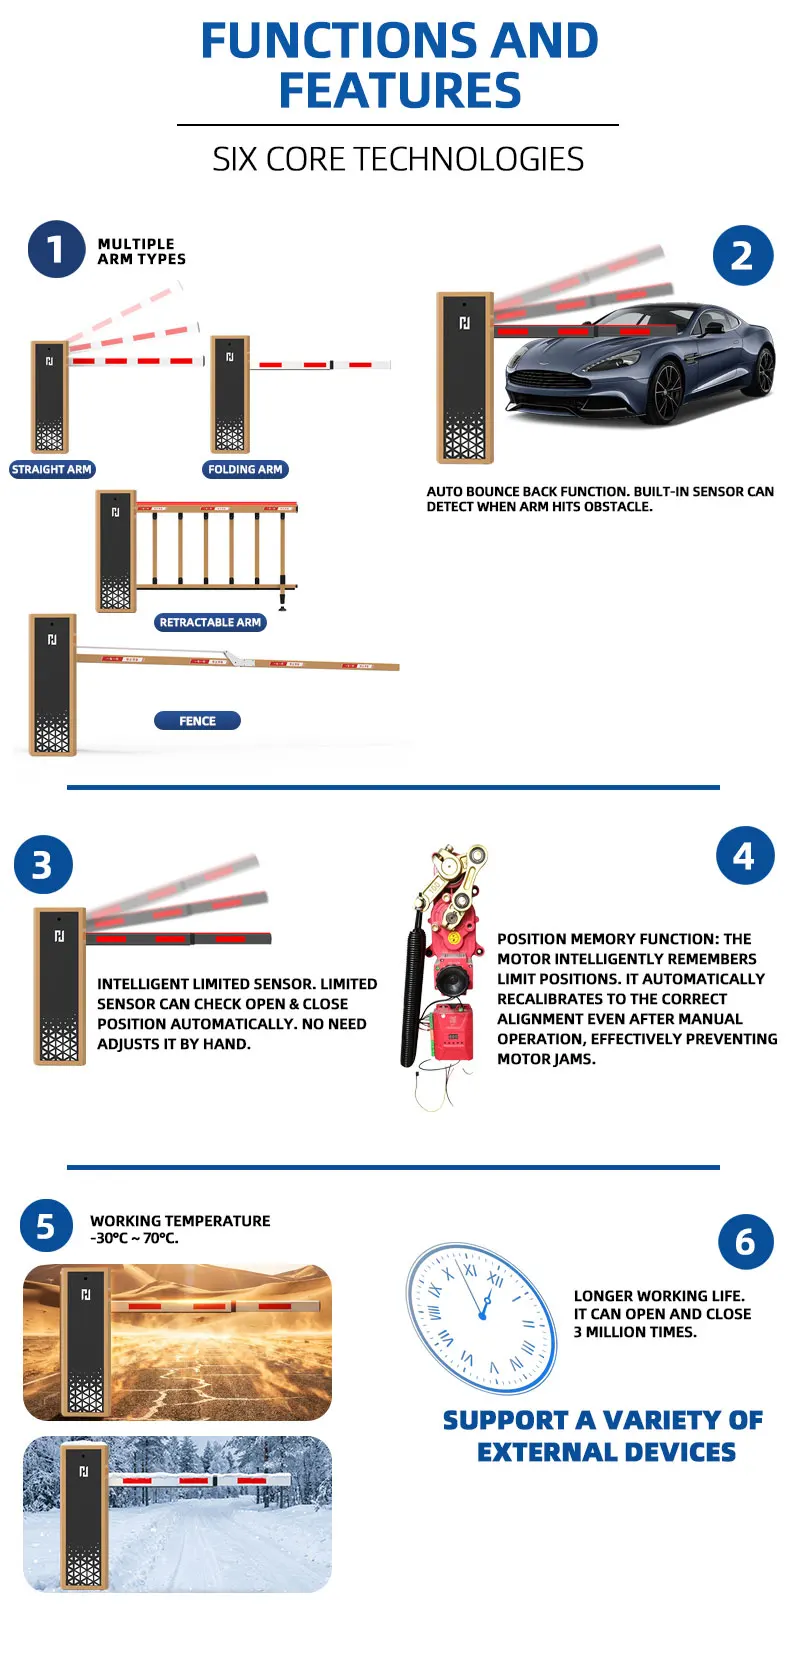
The entrance design must include a suitable means of detecting vehicles and obstructions and preventing the arm from closing on a vehicle or a person. Solutions can include a radar sensor, an inductive ground loop detector or other protective devices compatible with the controller. The choice depends on the lane geometry, the traffic characteristics and the surrounding environment.
Do not make the barrier arm the only means of managing pedestrian movement. Design a clear pedestrian route, use dedicated barriers or gates where needed, and provide warning signs and adequate lighting.
At sites with children, elderly people or heavy pedestrian traffic, the risk assessment should be reviewed carefully before commissioning.
6. Climate and Environmental Considerations in the UAE
Some installation sites in the UAE face high temperatures, direct sunlight, dust, humidity or salty coastal air. Review the operating temperature range, enclosure protection rating, corrosion resistance and maintenance requirements in the model specification. Do not assume that every barrier is automatically suitable for outdoor or coastal environments.
Choose a position that reduces exposure of the controller and cables to standing water or direct washing, and arrange drainage around the base. A schedule should also be set for inspecting covers, seals, connections and the arm, and for cleaning the sensors according to site conditions and the manufacturer instructions.
7. Integrate the Barrier with Car Park Systems
A parking barrier can be integrated with an RFID reader for authorised vehicles through integrated barrier solutions, with an ANPR/LPR camera for vehicle plate recognition, or with a ticketing system for visitors.
In residential communities and office buildings, the design may include registered vehicle lists, visitor permits and entry and exit records, depending on the approved control platform.
Before implementation, test the real operating scenarios: registered vehicle, visitor vehicle, unreadable plate, invalid card, communication loss and power failure. Define whether the system will keep the arm closed or allow controlled manual release in each case, and document this in the operating procedures.
8. Testing, Commissioning and Handover
After installation is complete, inspect the stability of the base, the fixing bolts, the straightness of the arm, the movement clearance, the condition of the cables and the earthing. Run several opening and closing cycles under technical supervision and confirm that the arm stops at the set limits and does not strike any obstruction during movement.
Test all control and protection functions, including the remote control, RFID or ANPR, the radar sensor or ground loop, the manual operating buttons and the emergency release mechanism where the model provides one. Record the test results and any site-specific settings before handover.
Hand over the operating and maintenance manual, the wiring diagram, the recommended spare parts list, the model data and the unit number to the site manager. Train operators to stop the system when a fault appears, secure the area and request technical support rather than attempting to repair electrical or mechanical parts without qualification.
9. Common Mistakes to Avoid
- Choosing the arm before measuring the lane: This can result in an arm that is too short or too long, or that conflicts with the building.
- Ignoring the clear height: A folding or straight arm may strike the ceiling or overhead services.
- Installing sensors without site testing: Blind spots or unstable readings may appear.
- Not planning the cables early: The contractor may have to break the floor or re-route the cabling.
- Overlooking pedestrian movement: The entrance may create a dangerous conflict point between people and vehicles.
- Relying on general specifications instead of the model data sheet: This can lead to the wrong power, speed or environmental protection selection.
10. Quick Checklist Before Installing a Parking Barrier
| Check Item | What to Confirm |
|---|---|
| Lane width | Clear measurement and barrier body position |
| Height | Ceiling, pipes, signage and obstructions |
| Arm type | Straight or hinged according to the site |
| Traffic density | Vehicle count and required duty cycle |
| Base | Dimensions, reinforcement and fixing to drawing |
| Power | Voltage, earthing, breaker and protection |
| Cables | Power, signal and communication routes |
| Safety | Radar, loop or other protective devices |
| Integration | RFID, ANPR/LPR or ticketing system |
| Environment | Heat, dust, humidity and corrosion |
| Handover | Commissioning test, training and documents |
Frequently Asked Questions About Parking Barrier Installation
What information should be provided before ordering a parking barrier?
Provide the lane width, entrance height, site photographs, vehicle movement direction, expected vehicle volume and the required control system. Sending a site plan and power supply information also helps determine the right configuration.
Is a hinged arm suitable for underground car parks?
It may be suitable where the clear height is limited, but the arm height when open, the hinge angle and the available space must be checked. This should be matched against the model drawings before the base is installed.
Can a vehicle barrier be linked to a plate recognition camera?
Yes. Barrier systems compatible with ANPR/LPR cameras can be integrated, provided the communication interfaces, control signals and the method for managing authorised vehicles and visitors in the chosen system are confirmed.
Do I need a radar sensor or an inductive ground loop?
That depends on the lane design, the required safety level and the control method. Radar, ground loops or other compatible solutions can be used to detect vehicles, and the detection range should be tested on the actual site.
Can one barrier serve both entry and exit?
A shared lane may be used at small sites where the traffic design allows it, but traffic priority, visibility, queue length and conflict prevention measures must be assessed. High-volume sites usually benefit from separate entry and exit lanes.
What should be tested before the system is handed over?
Testing should cover opening and closing, movement limits, control devices, sensors, integration with the access system and system behaviour on communication or power loss, together with handover of the drawings and the operating and maintenance manual.
Conclusion
Successful parking barrier installation in the UAE depends on careful site planning before work begins: measuring the lane and the clear height, choosing the right arm, preparing a stable base, organising power and cabling, specifying the sensors, integrating the control system, and then carrying out documented commissioning tests.
When these elements are reviewed against the model data sheet and the manufacturer drawings, the system better suits the site traffic and is easier to operate and maintain.
Latest News
Baroxon® | Leading Boom Barrier Manufacturer
Advanced Security Access Control and Intelligent Parking Solutions.
Company Strength
Adequate Inventory
Fast Shipping
Our Products
CONTACT US
Address: No. 2 Wanshou Road, International Innovation Industrial Park, Jinan, Shandong, China


© COPYRIGHT 2025 Baroxon® | Leading Boom Barrier Manufacturer

Contact Us
Our passion is to bring your ideas to life. Work with our design team to create a one-of-a-kind custom finish or cladding system to create a truly unique space. Together we can make your story stand out. If you need something to request a sample, request pricing, or request a demo, please fill out the contact form below. Explain your request in as much detail as you can and a representative will contact you within 1 business day.